4 comentarios

Beauty Tips Vol. III

Here I go with another beauty post, this kind of post are always about my personal opinion about products I have tried. While I was studying my bachelor I used to work at Sephora, probably the most of you know this retail beauty brand. There I had the opportunity to learn about beauty, make-up and tips, and even I’m not an expert, I like to share with you my opinion about different products. Also because my skin is a kind of special one: it is very delicate, sensitive and a bit oily… thus I often find myself in troubles when I don’t use the right products. 

De nuevo un post de belleza, me gusta compartir vosotros mi opinión personal sobre productos que he probado. Mientras estudiaba, solía trabajar en Sephora, seguro que la conocéis :) Allí aprendí un montón sobre tratamientos, maquillaje, trucos… y, aunque no soy una experta, sí que espero que mis opiniones os sean útiles. Además, como tengo la piel muy delicada, sensible y un poco grasa, siempre tengo problemas cuando uso los productos que no debo.


EstéeLauder_cream&lotion

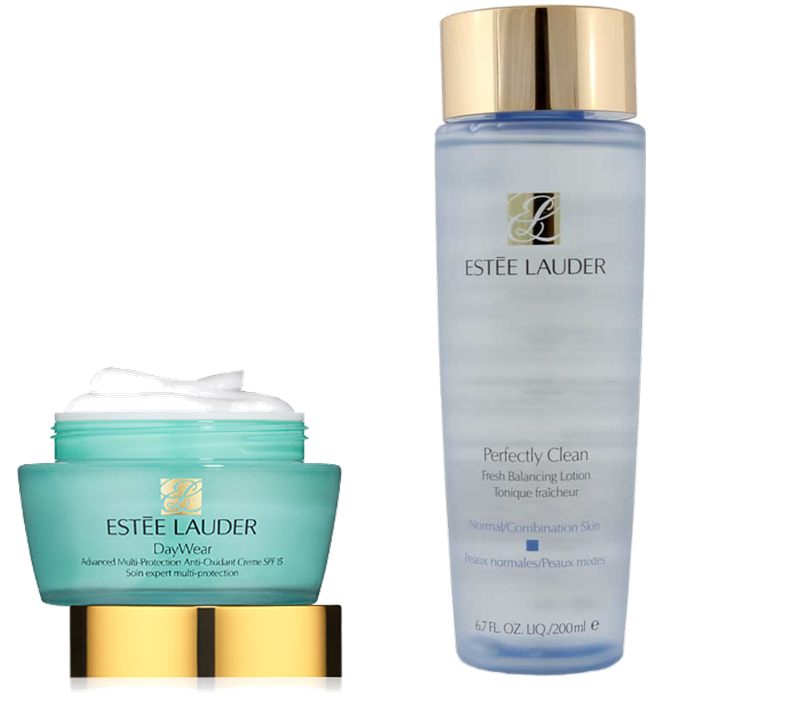
One of my favorite brands ever is Estée Lauder, you knew in this post that I don’t like all their products… but some of them are really good. It is the case of the moisturizer DayWear SPF 15, I’m currently using it, both in the mornings and before going to sleep, together with the Perfectly Clean lotion. It provides the right level of hydration without being greasy, while it prevents the first wrinkles to appear. It is important to have a good moisturizer but for me the key is to follow the cleaning ritual, consisting out of 4 steps, which could be 6: normally one cleans + applies the lotion and moisturizes. But in my case, I remove my make-up in two steps (oil to remove + soap to clean), I apply the lotion, the serum and then the moisturizer. 

Thank you for your comments :)

Una de mis marcas favoritas es Estée Lauder, en este post veréis que aunque no me gustan todos sus productos… algunos son geniales. Por ejemplo estoy usando la crema hidratante DayWear SPF15 y me encanta, la uso tanto por la mañana como por la noche, con el tónico Perfectly Clean, que también me gusta mucho. Siempre es importante usar buenos productos, a largo plazo se nota, pero la clave es limpiarse cada día (y noche) la piel aunque nos de pereza (que la da!), siguiendo normalmente 3 pasos: limpiar, tonificar y hidratar. Aunque yo por ejemplo uso 6 pasos: limpiar (aceite para quitar el maquillaje y jabón para limpiar), tonificar, aplicar sérum y poner la hidratante.

Gracias por vuestros comentarios :)


3 comentarios

Awesome 3D manicure by Ciaté

I don’t know if you have already heard about the caviar manicure (probably you did) but when my friends gave me this for my birthday, it was my first time. But as soon as I opened the box I knew I was going to like it a lot! Today I want to show you my first time doing this kind of manicure step by step. I hope you like the final result! 

No sé si ya habías oído hablar de la manicura de caviar (probablemente sí) pero para mí fue la primera vez cuando mis amigas me lo regalaron para mi cumple. Aunque tan pronto como abrí la caja supe que me iba a gustar un montón! Hoy quiero compartir con vosotr@s la primera vez que lo utilizo, paso a paso. ¡Espero que os guste el resultado!

As you can see it is a very cute box in which one can find eight different nail polishes: four standard and four «caviar» ones (the last are not exactly nail polish, they contain micro-balls instead). 

Como véis la cajita es muy mona y cuando la abres puedes encontrar ocho esmaltes de uñas: cuatro normales y cuatro de caviar (los últimos no son esmaltes sino micro bolitas).

IMG_5952

IMG_5953For my first caviar manicure I chose the silver/white combo :)

Para mi primera manicura de caviar escogí la combinación plata/blanco :)

IMG_5962Step 1: Apply the silver nail polish on all your nails.

Paso 1: Aplicar el esmalte plateado en todas tus uñas.

IMG_5969

IMG_5974Step 2: Apply the white caviar nail polish on the top when the silver one is still wet. In my case, I did it on just one nail. You need to do it putting the plastic tray underneath. After that, press the micro-balls with your finger and… this is how it looks like :)

Paso 2: Aplicar el esmalte blanco de caviar encima cuando el plateado aún está húmedo. En mi caso, elegí aplicarlo sólo en una uña. Tenéis que hacerlo poniendo la bandejita de plástico debajo. Después presiona las bolitas con el dedo y… así es como queda :)

IMG_5978

IMG_5980

IMG_5979Do you like the final result?

¿Os gusta el resultado final?

IMG_6002

IMG_6026Step 3: Put the small black funnel inside the bottle, so you can easily the micro-balls left and use them for next time!

Paso 3: Poner el embudo negro pequeño dentro de la botellita, así podemos recuperar facilmente las bolitas que nos han sobrado para usarlas la próxima vez!

If you want them to last longer, just add a layer of colorless nail polish on the top :)

Si queréis que os duren más, añadir una capa de brillo encima :)